|
My favorite quote from the Neil deGrasse Tyson interview is this kind of funny statement about black holes that he got from Stephen Hawking, I chose it because I thought it was pretty funny, and really intriguing. It provoked thoughts about launching something into a black hole and seeing what happens, and just researching it because they're so elusive and unclear.
"For science Stephen Hawking showed just recently that, and for me this is kinda spooky/amazing that black holes remember everything that they have ever eaten which means, it's not a tunnel to anywhere everything that it ate is sitting there at the singularity at its center now the spooky part, that's not the spooky part, the spooky part is Stephen Hawking showed forty years ago that black holes can actually evaporate the matter that's within a black hole can rise up out of the gravitational field that surrounds it and spontaneously birth a pair of particles that's just E=mc^2 doing it's thing E=mc^2" |
|
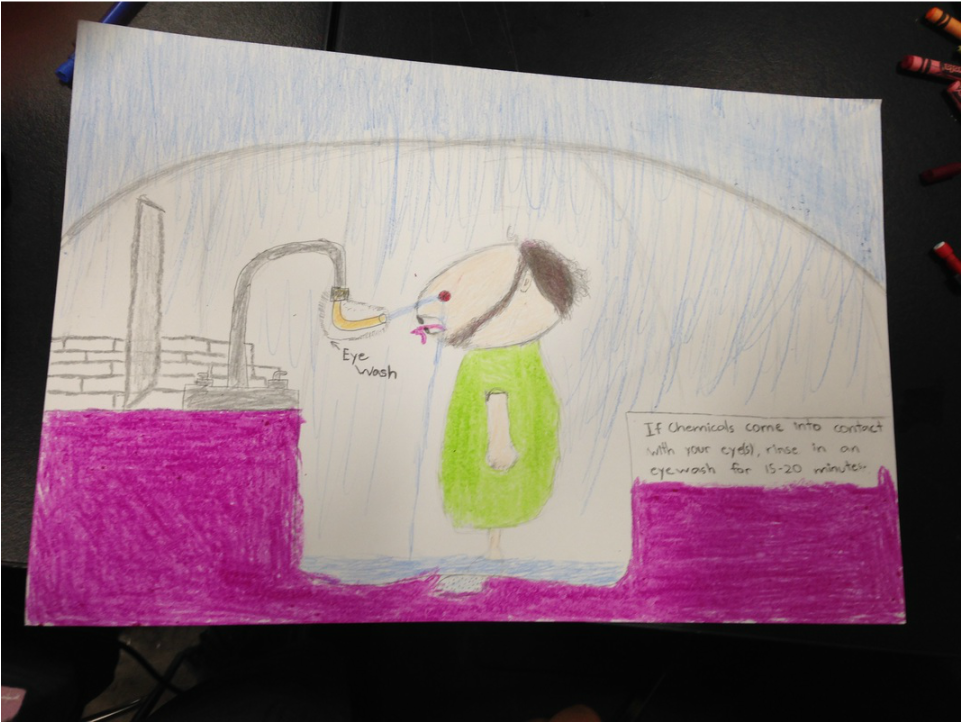
This Is The Safety Poster That We Made
It was supposed to illustrate a safety rule/concern in an obvious and understandable way. The rule was, "If chemicals come into contact with your eye(s), rinse in an eye wash for 15-20 minutes."
Explorations Into The Phases Of Matter (Playing With Oobleck & Dry Ice)
OOBLECK
Going into this project we were told about different phases of matter to lead on about whaty we were about to start. We looked at different parts like, sublimation, deposition, vaporization, condensation, melting and freezing. Looking back at our experiment the result was pretty good, seeing as how there wasn't much way that it could have gone wrong. All it consisted of was cornstarch and water in a pan that when mixed properly form a non-newtonian fluid called oobleck
Dry Ice
From this dry ice experiment, we were asked to look at the quantification of the dry ice and the amount of gas produced after its sublimation. We were given objects like balloons, trays and flasks to try and measure the quantity of the gas after it has left solid form. We found that the volume of a gas coming from a solid is a far larger amount than when you start at a solid.
We found out that at certain temperatures and pressures some solids can turn into a gas and by that fact there is usually more gas in volume than there is solid. The molecules in the dry ice substance
ROCKET PROJECT STAGE 1
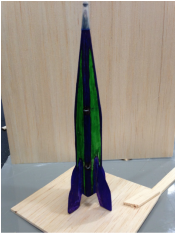
Our group had a distinct vision of what we wanted to do for this project. We intended to try and make the lightest most effective rocket, so that we could have something to be proud of and something to strive for. We tried to do that by making a very small rocket, that was already shorter than the others, and then we made the wood as thin as possible by sanding it down a lot without compromising the structural integrity of the rocket because that just wouldn't work very well.
Building the rocket itself was pretty simple seeing as it was only constructed out of superglue and balsa wood. First we took some balsa wood and cut it down to an approximated six inches, and we intended to make the fins stick off of the body enough to make it stand at seven inches. We took those pieces and drew lines down the sides of it to make it slant towards the top of the rocket to make the nose. After we drew the lines, we made cuts in the wood itself and then we glued those pieces together as closely as we could and made sure that there were no holes in the body of it. We checked for that because if there were any holes it wouldn't have flown well at all. After it dried, we went outside to sand the rocket and get rid of all the imperfections that would alter the quality of its flight. After we had sanded it down and made sure it looked perfect, we balanced it out and but a little thing on the nose of the rocket so that it wouldn't get damaged and moved on to making the fins which are displayed in the plan of our photo, we copied that shape but had to scale them up due to the ineffectiveness of very small fins.
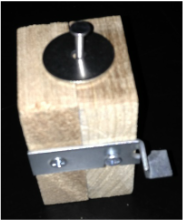
After that whole thing we started to make machines to make the motors that would power our rocket with. They consisted of; first, two blocks of wood cut to the same size which was about three inches by four inches, and then we drilled quarter inch holes in the center of the two of them making sure that they're as close together as possible and after that was smooth, we drilled holes in the back of it so that we could put hinges in it to make it easy to remove the motors after they were made. There was a latch on the front to close it tightly which was made out of another hinge and a small screw to hold it in and another to hold it closed, and that was all the components to that piece of the project.
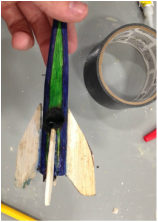
When we first tested our motor, instead of going to a bottle rocket first, we just put it straight into our rocket that we made which was a bit risky, but it ended up working pretty well seeing as how it didn't blow up our rocket the first time we flew it. That was something to rejoice about but the flight of that motor wasn't exactly admirable seeing as how it did a bit of a corkscrew towards the building but luckily no one got hurt. The reason for that malfunction was the size of our fins, they were a bit too small so for the second flight we made bigger fins so that it didn't try to impale anybody and it probably would have worked if it wasn't for the fact that our motor exploded and burnt a hole in the side of our rocket. After that fiasco we just decided to trash that body and just move on away from that section of the project and onto another.
We were kind of disappointed that our rocket didn't last very many flights, but we were glad anyway to have learned how to make the motors, rocket bodies and the motor making machines because we could use those skills again if we ever felt like doing it on our own or just having an idea on how the next section would play out. So it didn't live up to expectation but it still did teach us something. For some reason, our first motor worked and our second didn't which could have been partial to the fact that with our first one we spent almost a whole day on making it tediously slow and on our second go we didn't really spend much time on it at all which could have led to its malfunction so I would suppose that taking our time and making sure we did it right could have helped it work better. I think we figured out that the process to making a rocket and/or its motor takes a little bit of tedious work and a lot of concentration and attention to detail, but the end result is very reflective of that process if done right and it is also very fun to do. If I were to do this again I would definitely take my time on the different steps and also try to make a smaller rocket to see how far we could get it to go.
A picture of our vision, motor making machine, our first motor, our finished rocket, and a picture of our burnt tested rocket. (Left to Right)
Building the rocket itself was pretty simple seeing as it was only constructed out of superglue and balsa wood. First we took some balsa wood and cut it down to an approximated six inches, and we intended to make the fins stick off of the body enough to make it stand at seven inches. We took those pieces and drew lines down the sides of it to make it slant towards the top of the rocket to make the nose. After we drew the lines, we made cuts in the wood itself and then we glued those pieces together as closely as we could and made sure that there were no holes in the body of it. We checked for that because if there were any holes it wouldn't have flown well at all. After it dried, we went outside to sand the rocket and get rid of all the imperfections that would alter the quality of its flight. After we had sanded it down and made sure it looked perfect, we balanced it out and but a little thing on the nose of the rocket so that it wouldn't get damaged and moved on to making the fins which are displayed in the plan of our photo, we copied that shape but had to scale them up due to the ineffectiveness of very small fins.
After that whole thing we started to make machines to make the motors that would power our rocket with. They consisted of; first, two blocks of wood cut to the same size which was about three inches by four inches, and then we drilled quarter inch holes in the center of the two of them making sure that they're as close together as possible and after that was smooth, we drilled holes in the back of it so that we could put hinges in it to make it easy to remove the motors after they were made. There was a latch on the front to close it tightly which was made out of another hinge and a small screw to hold it in and another to hold it closed, and that was all the components to that piece of the project.
When we first tested our motor, instead of going to a bottle rocket first, we just put it straight into our rocket that we made which was a bit risky, but it ended up working pretty well seeing as how it didn't blow up our rocket the first time we flew it. That was something to rejoice about but the flight of that motor wasn't exactly admirable seeing as how it did a bit of a corkscrew towards the building but luckily no one got hurt. The reason for that malfunction was the size of our fins, they were a bit too small so for the second flight we made bigger fins so that it didn't try to impale anybody and it probably would have worked if it wasn't for the fact that our motor exploded and burnt a hole in the side of our rocket. After that fiasco we just decided to trash that body and just move on away from that section of the project and onto another.
We were kind of disappointed that our rocket didn't last very many flights, but we were glad anyway to have learned how to make the motors, rocket bodies and the motor making machines because we could use those skills again if we ever felt like doing it on our own or just having an idea on how the next section would play out. So it didn't live up to expectation but it still did teach us something. For some reason, our first motor worked and our second didn't which could have been partial to the fact that with our first one we spent almost a whole day on making it tediously slow and on our second go we didn't really spend much time on it at all which could have led to its malfunction so I would suppose that taking our time and making sure we did it right could have helped it work better. I think we figured out that the process to making a rocket and/or its motor takes a little bit of tedious work and a lot of concentration and attention to detail, but the end result is very reflective of that process if done right and it is also very fun to do. If I were to do this again I would definitely take my time on the different steps and also try to make a smaller rocket to see how far we could get it to go.
A picture of our vision, motor making machine, our first motor, our finished rocket, and a picture of our burnt tested rocket. (Left to Right)

|
|

|
|
|
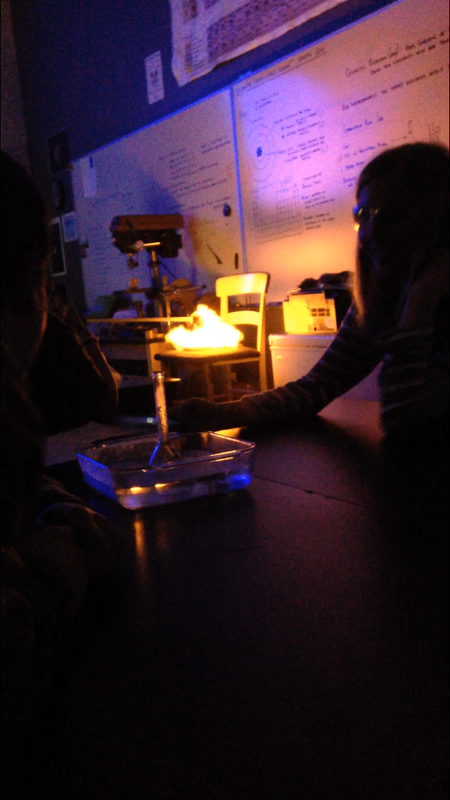
Combustion Lab
Before the experiment we talked about different parts of atoms, and how the table of elements and how they classify different pieces of the atom. After we had a decent understanding of that, we filled a flask with water and citric acid, and dropped some magnesium in it. Then we put a balloon over the lip of the flask and collected some hydrogen in it. Then we took it off and tied it off. After that we put it on a stick and lit it up to see the chemical reaction. We saw the balloon explode in the effort of making water out of hydrogen and watched andrew pour some off of the plate that we did it over.